
Last time, I wrote about the possibility that crunches could be doing you more harm than good. I hope I was able to make some sense and convince you to look for alternative ways to train your abdominal region. Today, I shall write about these alternative exercises and why you should incorporate them into your routine.
First of all, we need to define what muscles make up the core. According to the New Rules of Lifting for Abs, the core includes all the muscles that attach to your hips, pelvis and lower back. These include the 4 layers of abdominals, hip flexors, hip extensors, spine extensors, hip adductors & abductors, multifidus (which you’ll only hear about when your doctor diagnoses your lower back pain), and the lats. Basically, all the muscles from below your shoulder up to the bottom of your butt.
When coaches talk about core stability, what we really are referring to is lower back or lumbar spine stability. We want this area to move as little as possible during exercises and stay in what we call a “neutral zone.” If your lower back is pushed or pulled (trunk hyperextension or flexion) out of this zone repeatedly, it may lead to lower back pain. Examples would be slouching all day long at your office chair, or while driving in heavy traffic, or even picking up heavy objects with your back bent.
So what exercises can you do help strengthen your core muscles to keep your lumbar spine in this neutral zone?
To begin with, you should be doing exercises that are known as “Static Stability” exercises. Under this, you will have to do different kinds of exercises classified under anti-extension, anti-lateral flexion, and anti-rotation. Notice that all of these basic exercises are all “anti-movement.” The ability to resist movement is the true function of our midsection. It has to stay stable and serve as a base for our moving extremities.
The most basic of these exercises are called planks. Planks are classified as anti-extension exercises since when you do them, gravity will pull your lower back into hyperextension and you will have to resist this force.
The following pictures and descriptions will show you how to do a basic plank and some of its most common progressions that you can do at home.
 Fig. 1 Plank Get into a modified push-up position, with your weight resting on your forearms and toes. Your body should be aligned from your head to your ankles. Try to hold this position from 60-90 seconds. If you can’t, hold it as long as you can, rest, then go up again until you hit 60 seconds.
 Fig. 2 Plank with Leg Lift From the plank position, lift one leg so the toes are a foot off the floor. Hold this position anywhere from 30-45 seconds then switch legs.
 Fig. 3 Plank with Arm Lift Set up with your feet slightly wider. Lift one arm out diagonal to your torso. Hold this position for 10-15 seconds, switch arms, and then continue on for 60-90 seconds. This is progression is a big step in difficulty and you should fight the rotational force that your torso will undergo.
 Fig. 4 Plank with Feet Elevated Set up with your toes on an elevated surface like a bench or box and your forearms on the floor. Try to maintain a straight line from your head to your ankles and hold this position from 60-90 seconds. This is harder than a basic plank because you will be supporting more of your body weight with this variation.
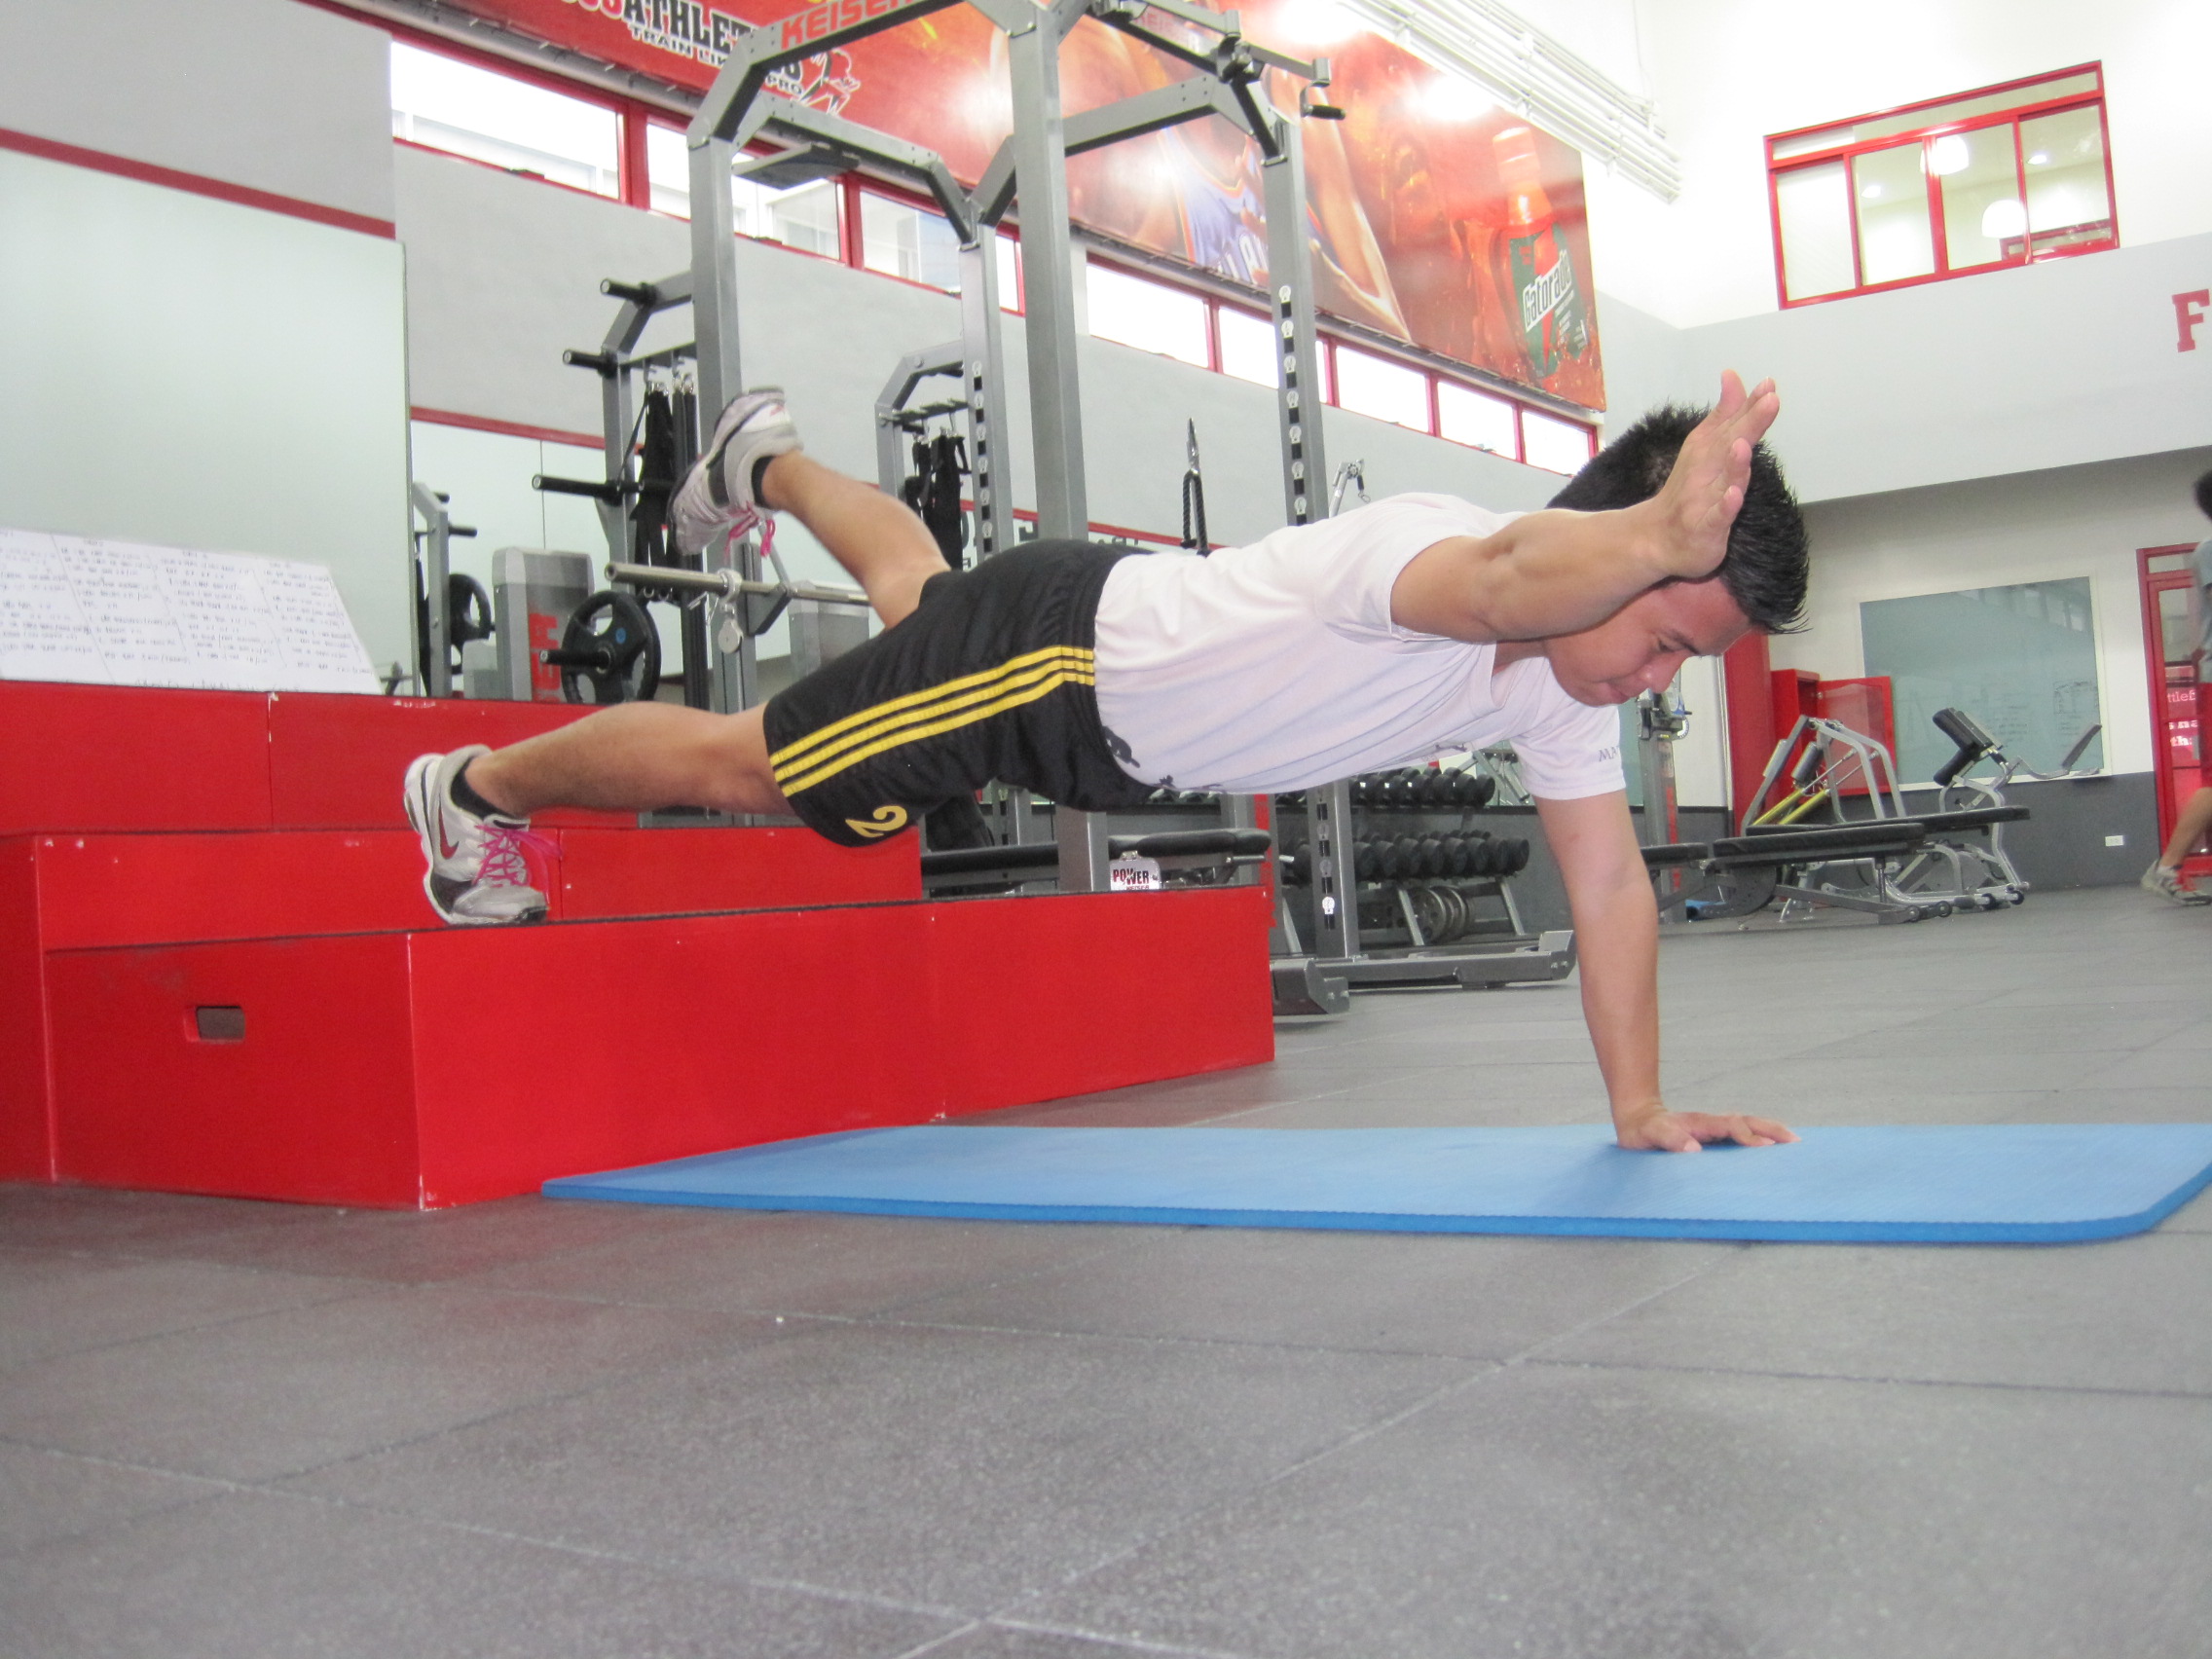 Fig. 5 Push-up Hold with Feet Elevated + Leg & Arm Raise Start with your hands below your shoulders and then raise an arm with opposite-side leg raise. Try to hold this pose for 10 seconds then switch arms and legs, for a total of around 60-90 seconds. You can also do this variation with your feet on the ground.
Remember though that while doing planks, the first thing you should focus on is form. Always try to maintain a straight line from your head to your ankles throughout the exercise. If you feel yourself lower back area sagging or your butt lifting in the air, it would be better to take a 2 to 5 second rest then go up again to finish the prescribed time. It would be best if you could check your form in a mirror or have someone look at you. You should have the feeling of making your torso as long as possible.
Next time, I’ll be writing on anti-lateral flexion and anti-rotation exercises.
